Initial Configuration
Configuring the SMTP Relay
Access the server through SSH with an account with administrative privileges;
Run the Horizon Configuration Utility with the following command:
$ /opt/horizon/sbin/horizon-config
In the main menu, select 'SMTP':
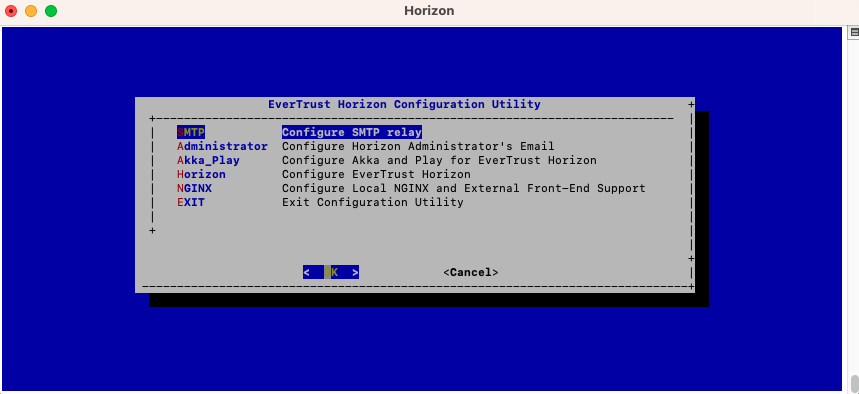
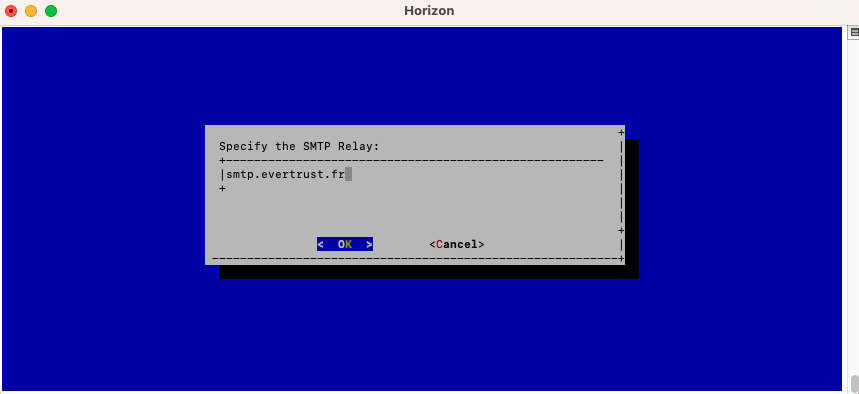
Specify IP address or the DNS name of the SMTP relay and validate:
The Postfix configuration is updated:

Exit the configuration utility and restart the Postfix service with the following command:
$ systemctl restart postfix
Configuring the Horizon Administrator’s Email Address
Access the server through SSH with an account with administrative privileges;
Run the Horizon Configuration Utility with the following command:
$ /opt/horizon/sbin/horizon-config
In the main menu, select Administrator:
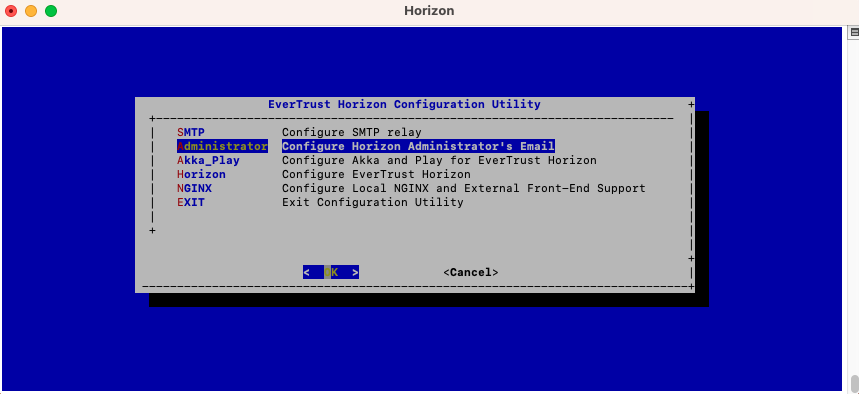
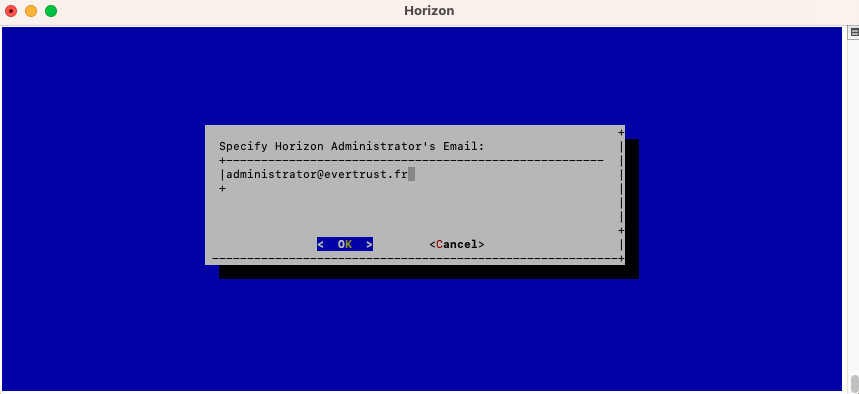
Specify the email address of the Horizon Administrator and validate:
Exit the Configuration Utility;
Validate the SMTP relay and Administrator Email Address with the following commands:
$ yum install mailx
$ mail -s "Hello Horizon root"
  > Hello From Horizon
  .
Ensure that the email receives the test email.
Generating a new Horizon Application Secret
Access the server through SSH with an account with administrative privileges;
Run the Horizon Configuration Utility with the following command:
$/opt/horizon/sbin/horizon-config
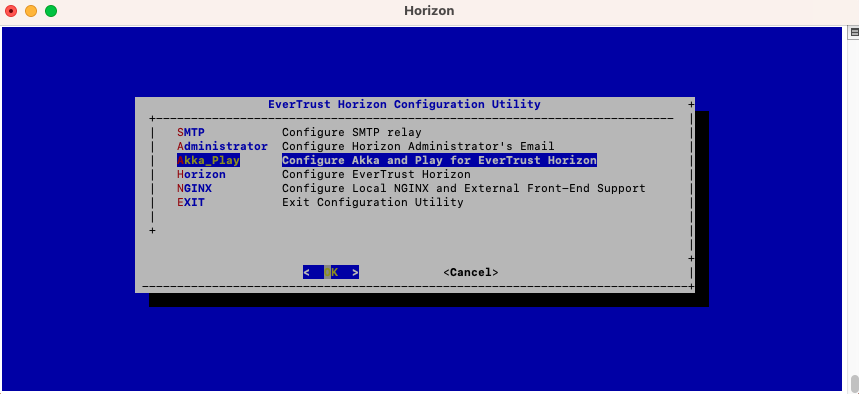
In the main menu, select 'Akka_Play':
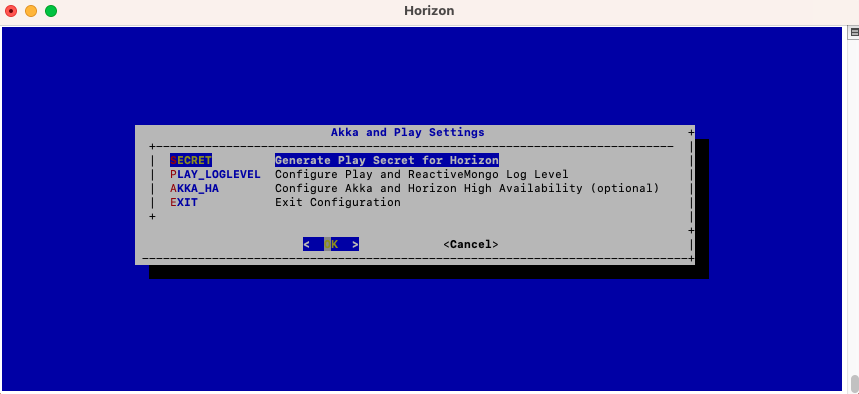
In the Akka_Play menu, select 'SECRET':
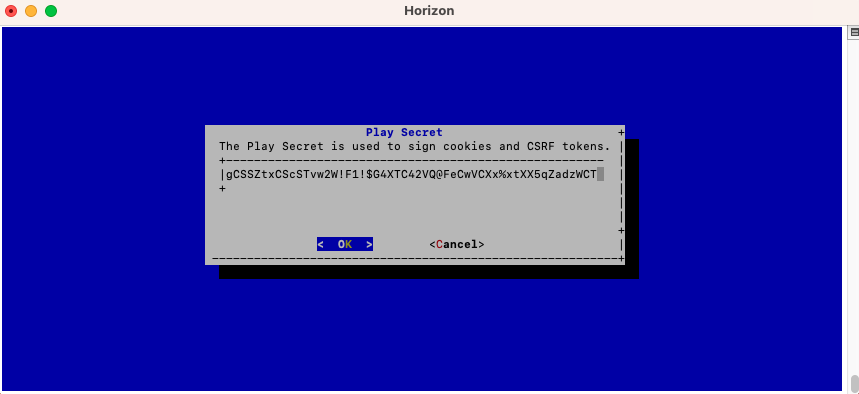
Validate the new Horizon Application Secret:
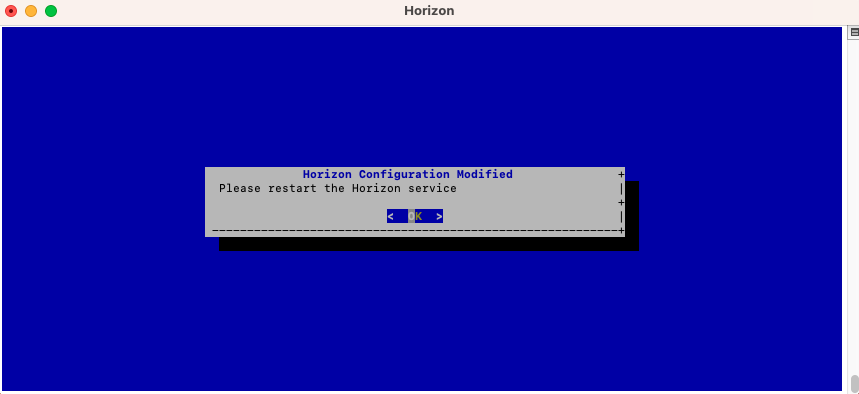
The Horizon configuration is updated:
JVM Configuration
Horizon allows you to configure the xms (minimum memory allocation pool) and xmx (maximum memory allocation pool) parameters of the JVM running Horizon using the configuration tool.
Access the server through SSH with an account with administrative privileges;
Run the Horizon Configuration Utility with the following command:
$ /opt/horizon/sbin/horizon-config
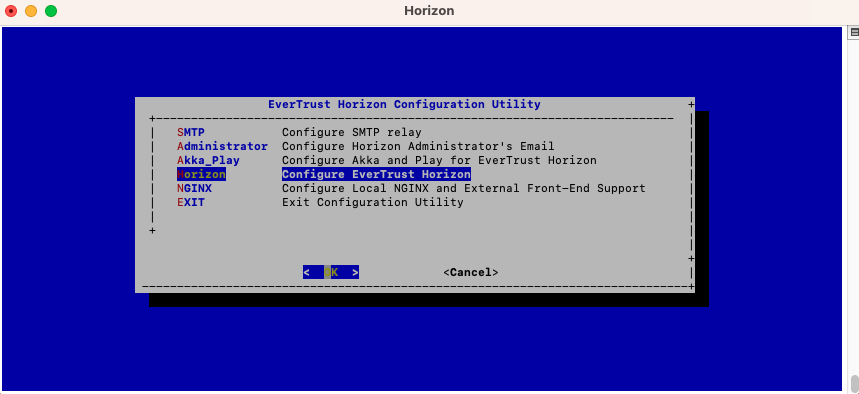
In the configuration menu, select 'Horizon':
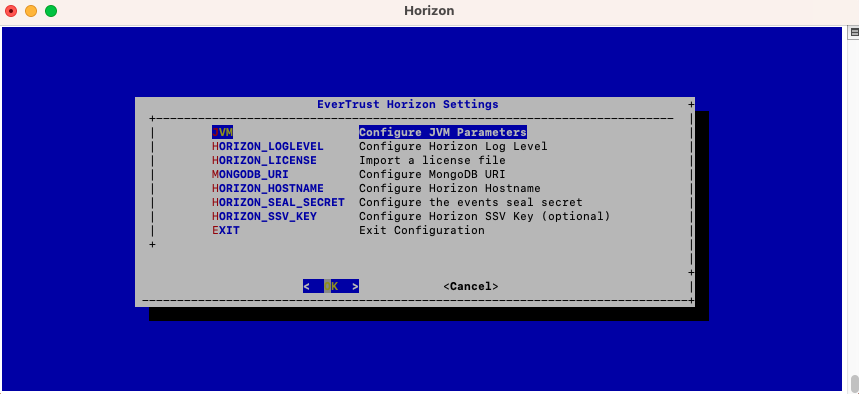
In the Horizon configuration menu, Select 'JVM':
Specify the 2048 for xms and 3072 for xmx parameters and select 'OK':

The new JVM parameters are configured:
MongoDB URI Configuration
Access the server through SSH with an account with administrative privileges;
Run the Horizon Configuration Utility with the following command:
$ /opt/horizon/sbin/horizon-config
In the main menu, select Horizon:
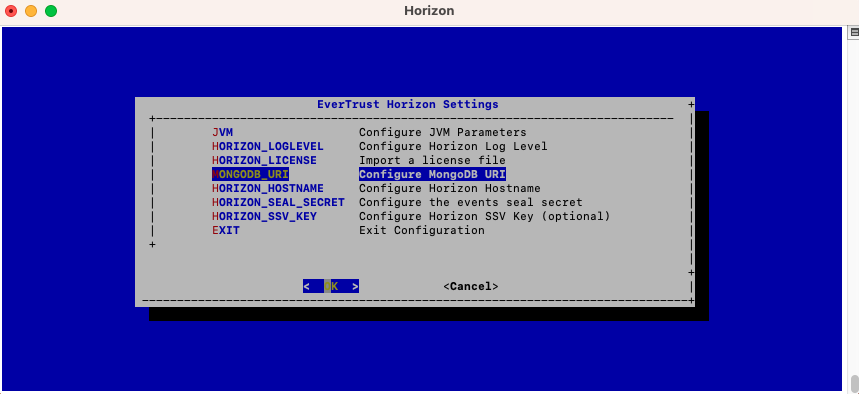
In the Horizon configuration menu, Select MONGODB_URI:
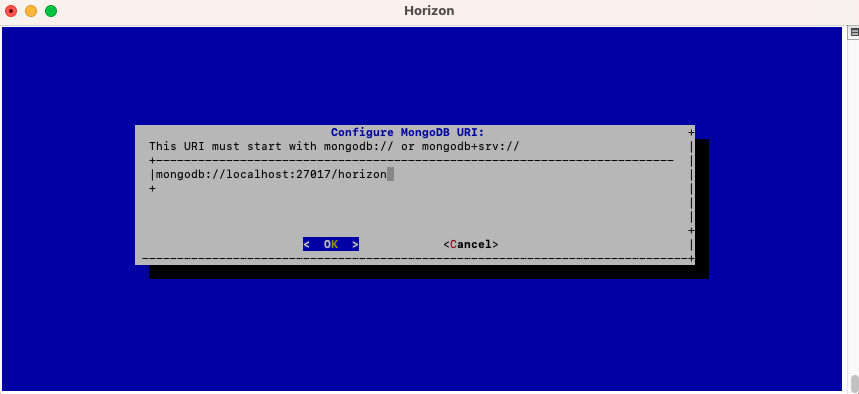
Specify the MongoDB URI to target your MongoDB instance:
|
Horizon is installed to target a local MongoDB instance by default. If you use an external MongoDB (such as MongoDB Atlas Database or dedicated On-premises database) instance:
External MongoDB database URI syntax:
External MongoDB cluster of databases URI syntax:
|
The MongoURI is configured:
Horizon Hostname Configuration
Access the server through SSH with an account with administrative privileges;
Run the Horizon Configuration Utility with the following command:
$ /opt/horizon/sbin/horizon-config
In the main menu, select 'Horizon':
In the Horizon configuration menu, select HORIZON_HOSTNAME:

Specify the DNS FQDN by which Horizon will be accessed:
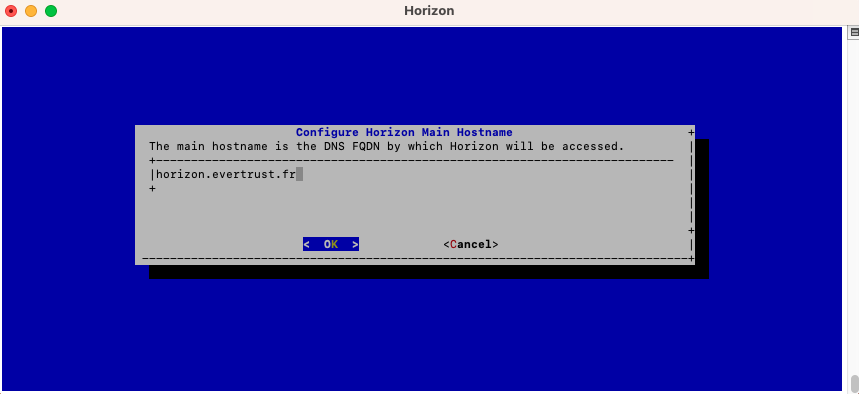
The Horizon Hostname is configured:
Generating an event seal secret
Horizon will generate functional events when using the software.
These events are typically signed and chained to ensure their integrity. Therefore, you must specify a sealing secret for this feature to work correctly.
Access the server through SSH with an account with administrative privileges;
Run the Horizon Configuration Utility with the following command:
$ /opt/horizon/sbin/horizon-config
In the main menu, select 'Horizon':
In the Horizon menu, select 'HORIZON_SEAL_SECRET':
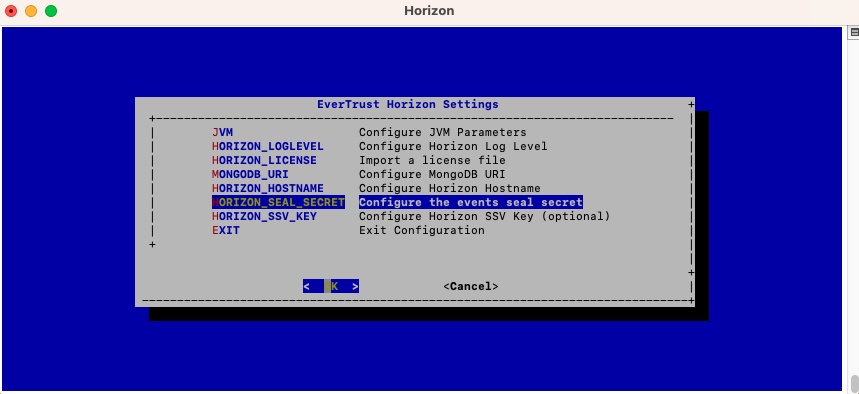
Validate the new event seal secret:

The event seal secret is now configured :
Installing the Horizon license
|
You should have been provided with a 'horizon.lic' file. This file is a license file and indicates:
|
Upload the horizon.lic file through SCP under /tmp/horizon.lic;
Access the server through SSH with an account with administrative privileges;
Run the Horizon Configuration Utility with the following command:
$ /opt/horizon/sbin/horizon-config
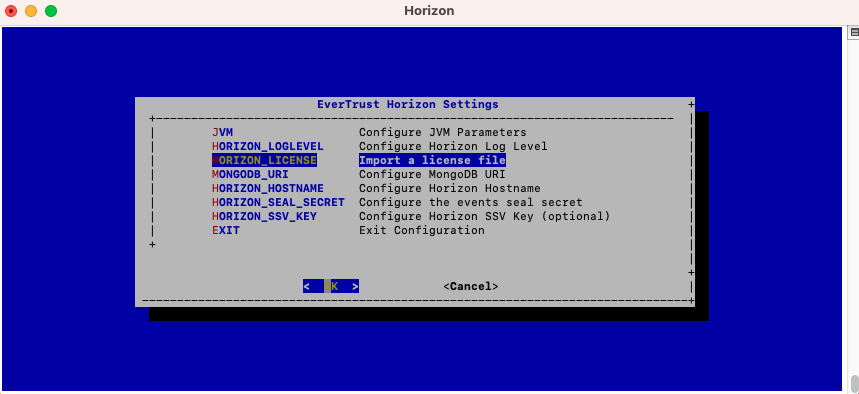
In the main menu, select 'Horizon':
In the Horizon configuration menu, Select 'HORIZON_LICENSE':
Specify the path /tmp/horizon.lic and validate:

The Horizon License is configured:
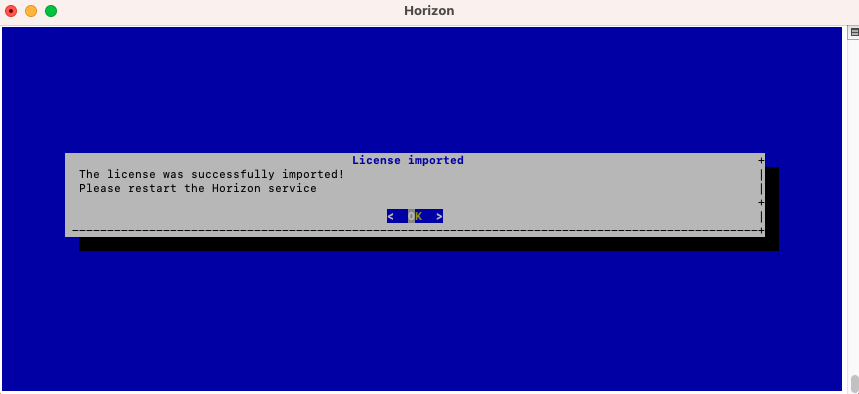
Restart the horizon service using the following command:
$ systemctl restart horizon
Horizon Vault Key configuration
|
Horizon stored sensitive data in a secure way using encryption. Horizon masterkey can be derived from:
Please refer to the proper section according to your setup. |
Horizon SSV key Configuration (Software)
| This section must not be followed if you use another vault than the default one. |
Access the server through SSH with an account with administrative privileges;
Run the Horizon Configuration Utility with the following command:
$ /opt/horizon/sbin/horizon-config
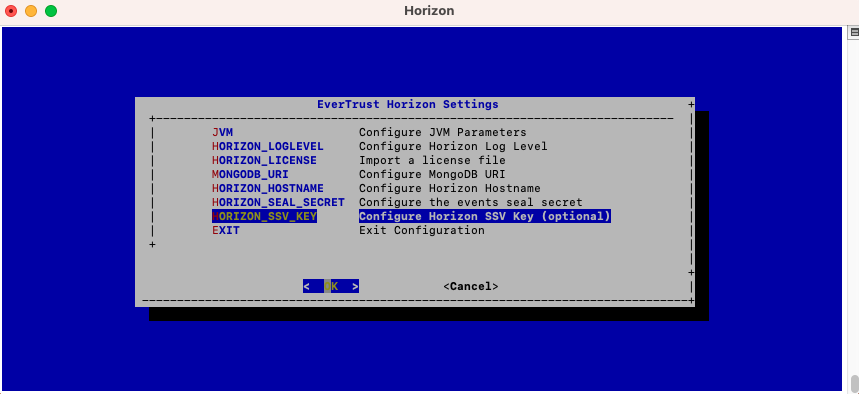
In the main menu, select 'Horizon':
In the Horizon configuration menu, Select 'HORIZON_SSV_KEY':
Specify the master key that will be used:
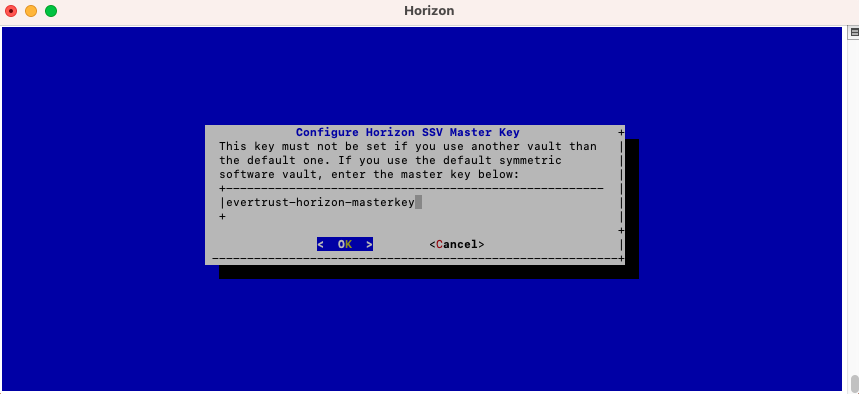
Horizon masterkey is configured:
Restart the horizon service using the following command:
$ systemctl restart horizon
HSM vault Configuration
Horizon supports PKCS#11 compatible HSM vaults.
| This section must not be followed if you use another vault than the HSM vault. |
|
HSM middleware should be properly installed and HSM slot initialization should be done using the tools provided by the HSM provider. "horizon" linux user should be member of the proper HSM linux management group to perform cryptographic operations ('nfast' for nCipher nShield HSM or 'hsmusers' for Luna HSM for example). |
Access the server through SSH with an account with administrative privileges;
Create a vaults.conf configuration file in /opt/horizon/etc/conf.d directory with the following content to configure the HSM vault:
default {
  module_path = ""
  slot_id = ""
  pin = ""
  label = ""
  allow_master_key_gen = true
}-
module_path: The path to the PKCS#11 library (string between double quotes); -
slot_id: ID of the Slot on the PKCS#11 Module (string between double quotes); -
pin: The PIN used to authenticate to your HSM slot (string between double quotes); -
label: Label of key (string between double quotes); -
allow_master_key_gen: Allow the masterkey to be generated by Horizon if not found in the slot.
Set the permissions using the following commands:
$ chown horizon:horizon /opt/horizon/etc/conf.d/vaults.conf
Restart the horizon service using the following command:
$ systemctl restart horizon
|
At the end of the installation procedure:
|
Installing Horizon on a cluster of servers
| This section must not be followed if you plan on deploying Horizon in standalone mode (vs cluster mode). WARNING: This section does not explain how to install Horizon on a Kubernetes cluster. Please refer to the dedicated section. |
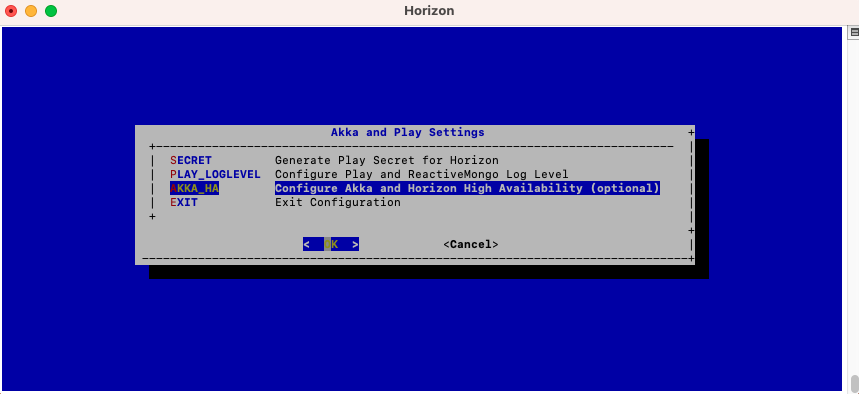
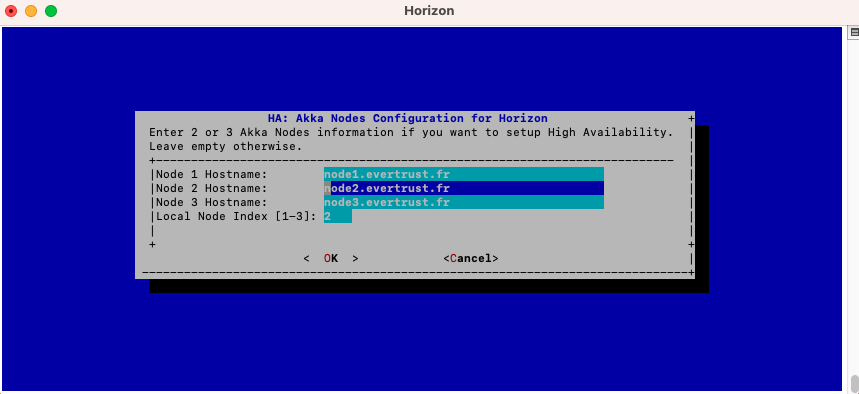
In the main menu, select 'Akka_Play':
In the Akka_Play menu, select 'AKKA_HA':
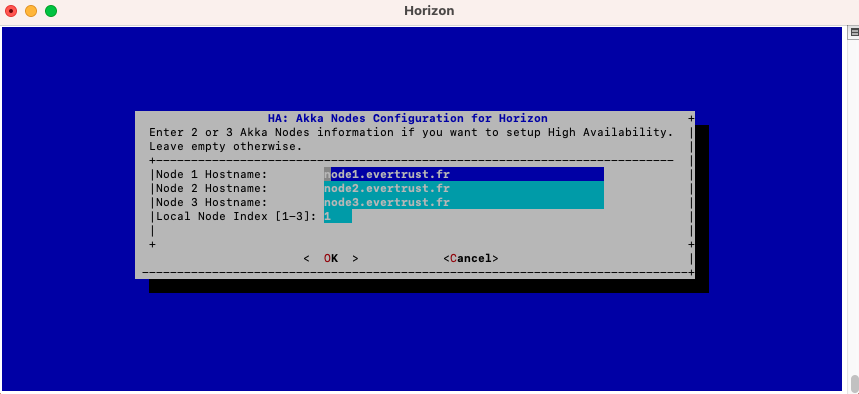
In this menu, specify either the IP address or the DNS name for each server that will be running Horizon on this cluster, as well as the local node index (the number of the node that you are configuring at that moment).
|
Note that the local node index must match the Node Hostname parameter: |
Save your changes from the menu.
The High Availability mode is now configured on the current node :
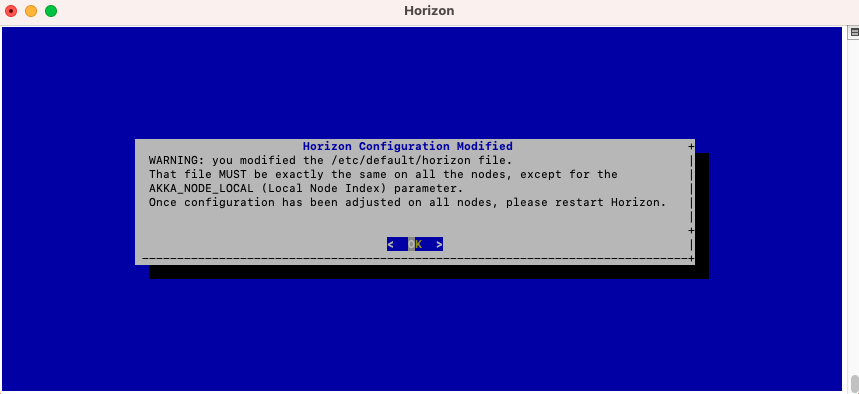
You must now configure your other nodes, but because they belong to the same cluster they need to share the same secret, the same secret seal event, the same hostname and the same database.
In order to be able to do that, you need to copy the configuration file that was generated by the horizon-config app, named /etc/default/horizon and paste it on each one of your nodes;
Then on each other node, run the Horizon Configuration utility with the following command:
$ /opt/horizon/sbin/horizon-config
In the Akka_Play menu, select 'AKKA_HA':
Here, you need to change the local node index to match the hostname of the node that you are configuring:
| You will need to import the Horizon licence file on each node manually, following the guidelines of section Installing the Horizon license. |
Additionally, on each node, you will need to open the ports used for Akka_HA and Akka_MGMT, which are by default 25520 and 8558:
$ firewall-cmd --permanent --add-port=25520/tcp
$ firewall-cmd --permanent --add-port=8558/tcp
Reload the firewall configuration with:
$ systemctl restart firewalld
Restart the Horizon service on each one of the nodes:
$ systemctl restart horizon